
햄발
Bank App 만들기 - 파일 업로드(멀티파트) 본문
학습 목표

1. 멀티파트(Multipart)에 대한 기본적인 이해
2. 스프링 프로젝트에서의 멀티파트 처리
3. 회원 가입시 파일 업로드 기능 구현
4. 주요 전체 코드 확인
1. 멀티파트(Multipart)에 이해
멀티파트(Multipart)는 HTTP 프로토콜을 사용하여 웹 서버로 파일이나 데이터를 업로드할 때 사용되는 데이터 전송 방식 중 하나입니다. "멀티파트"라는 용어는 말 그대로 메시지가 여러 부분으로 구성되어 있음을 의미하며, 이러한 각각의 부분은 다른 유형의 데이터를 담을 수 있습니다.
HTTP 메시지에는 클라이언트가 전송하는 HTTP 요청, 그리고 서버가 반환하는 HTTP 응답이 있습니다.

텍스트 기반 HTTP 메세지
POST /example HTTP/1.1
Host: example.com
Content-Type: text/plain
Content-Length: 13
---- CLRF 빈줄 공백 --------
Hello, World!
바이너리 기반 16진수 HTTP 메세지
POST /example HTTP/1.1
Host: example.com
Content-Type: application/octet-stream
Content-Length: 5

\x48\x65\x6C\x6C\x6F
HTTP 메시지는 크게 시작 라인(start line), 헤더(headers), 그리고 바디(body) 세 부분으로 구성됩니다.
여기서 바디 부분은 실제 전송하려는 데이터를 담고 있고, 멀티파트 요청에서는 이 바디 부분에 텍스트 기반 데이터와 바이너리 데이터가 함께 포함될 수 있습니다.
이해를 돕기 위한 HTTP 예시
POST /submitForm HTTP/1.1
Host: tenco.com
Content-Type: multipart/form-data; boundary="boundary123"
Content-Length: [계산된 총 길이]

--boundary123
Content-Disposition: form-data; name="username"

길동
--boundary123
Content-Disposition: form-data; name="password"

1234
--boundary123
Content-Disposition: form-data; name="binaryData"; filename="data.bin"
Content-Type: application/octet-stream

01010101 01101100 01101100 01101111
--boundary123--
boundary="boundary123” 은 멀티파트 메시지의 각 부분을 구분하기 위한 문자열입니다.
그리고 2진수로 표현되어 있는 부분은 보통 16진수 인코딩 되어 전송이 됩니다(이해를 돕기 위해 01010로 2진수로 표현)
여기서 핵심은 ‘바디 부분에 텍스트 기반 데이터와 바이너리 데이터가 함께 포함 될 수 있다’ 입니다.
2. 스프링 프로젝트에서의 멀티파트 처리
스프링 프레임워크에서는 멀티파트 요청을 처리하기 위한 기능을 제공합니다.
스프링의 MultipartResolver 인터페이스는 멀티파트 요청을 파싱하고, 업로드된 파일과 폼 데이터에 접근할 수 있는
API를 제공합니다. 즉, 스프링 부트(Spring Boot) 프로젝트에서는 추가적인 설정 없이도 멀티파트 지원이 자동으로 활성화되며, 필요한 경우 application.properties 또는 application.yml 파일을 통해 멀티파트 관련 설정을 커스터마이즈할 수 있습니다.
멀티 파트 요청 처리 예시 코드
@PostMapping("/upload")
public String handleFileUpload(@RequestParam("name") String name,
                               @RequestParam("file") MultipartFile file) {
    if (!file.isEmpty()) {
        // 파일 처리 로직
    }
    // 추가 작업
    return "redirect:/success";
}
@RequestParam("file") MultipartFile file
@RequestParam 어노테이션을 사용하여 멀티파트 폼 데이터에서 업로드된 파일을 받아옵니다.
MultipartFile 인터페이스는 업로드된 파일에 대한 정보와 데이터에 접근할 수 있는 메서드를 제공합니다.
우리 프로젝트에서는 WebDataBinder 를 활용한 파싱 방식을 사용할 예정 입니다.(DTO)
3. 회원 가입시 파일 업로드 기능 구현
application.yml
application.yml
spring:
  mvc:
    view:
      prefix: /WEB-INF/view/ #JSP파일이 위치한 디렉토리 접두사를 설정합니다.
      suffix: .jsp #뷰 이름에 자동으로 추가될 파일 확장자를 설정합니다.
  servlet:
    multipart:
      max-file-size: 20MB #파일 최대 크기 20MB
max-request-size: 20MB #멀티파트 전체 요청 크기 20MB제한- max-file-size: 기본값은 1MB입니다. 이는 단일 파일 업로드 시 최대 파일 크기를 의미합니다.
- max-request-size: 기본값은 10MB입니다. 이는 멀티파트 요청의 전체 크기에 대한 최대값을 의미합니다.
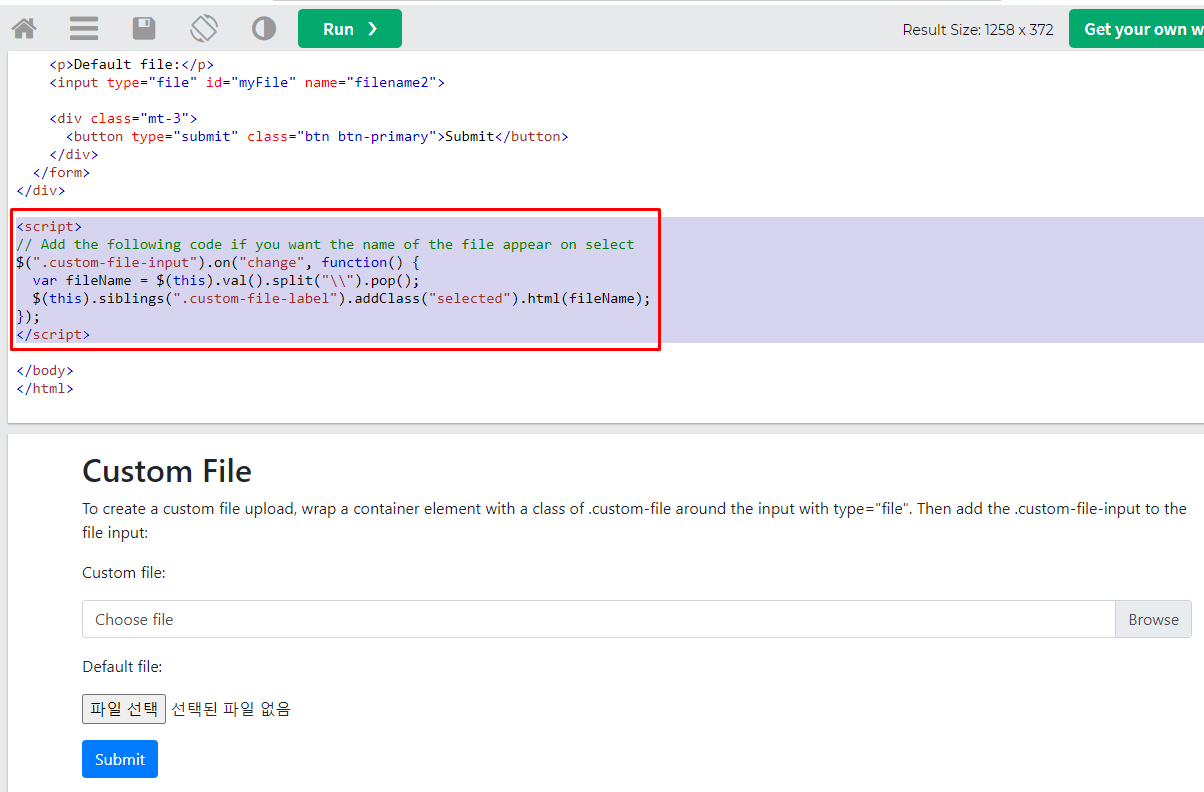
회원 가입 화면에서 파일 업로드 폼 만들어 주기

부트스트랩4 활용 - Custom File Upload 부분을 활용
https://www.w3schools.com/bootstrap4/bootstrap_forms_custom.asp
W3Schools.com
W3Schools offers free online tutorials, references and exercises in all the major languages of the web. Covering popular subjects like HTML, CSS, JavaScript, Python, SQL, Java, and many, many more.
www.w3schools.com


블록 지정한 <script> 파일을 복사한 후 SignUp.jsp에 붙여넣기 한다.
signUp.jsp
signUp.jsp
<%@ page language="java" contentType="text/html; charset=UTF-8" pageEncoding="UTF-8"%>
<!-- header.jsp -->
<%@ include file="/WEB-INF/view/layout/header.jsp"%>
<!-- start of content.jsp(xxx.jsp) -->
<div class="col-sm-8">
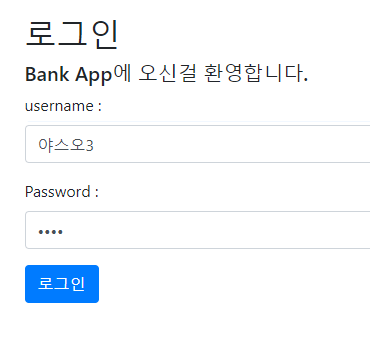
<h2>회원 가입</h2>
<h5>Bank App에 오신걸 환영합니다</h5>
<form action="/user/sign-up" method="post" enctype="multipart/form-data">
<div class="form-group">
<label for="username">username:</label> <input type="text" class="form-control" placeholder="Enter username" id="username" name="username" value="야스오1">
</div>
<div class="form-group">
<label for="pwd">Password:</label> <input type="password" class="form-control" placeholder="Enter password" id="pwd" name="password" value="asd123">
</div>
<div class="form-group">
<label for="fullname">fullname:</label> <input type="text" class="form-control" placeholder="Enter fullname" id="fullname" name="fullname" value="바람검객">
</div>
<div class="custom-file">
<input type="file" class="custom-file-input" id="customFile" name="mFile">
<label class="custom-file-label" for="customFile">Choose file</label>
</div>
<br>
<div class="d-flex justify-content-end">
<button type="submit" class="btn btn-primary mt-md-4">회원가입</button>
</div>
</form>
</div>
<!-- end of col-sm-8 -->
</div>
</div>
<!-- end of content.jsp(xxx.jsp) -->
<script>
// Add the following code if you want the name of the file appear on select
$(".custom-file-input").on("change", function() {
console.log($(this).val());
let fileName = $(this).val().split("\\").pop();
$(this).siblings(".custom-file-label").addClass("selected").html(fileName);
});
</script>
<!-- footer.jsp -->
<%@ include file="/WEB-INF/view/layout/footer.jsp"%>
WebMvcConfig.java
WebMvcConfig.java
package com.tenco.bank.config;

import org.springframework.beans.factory.annotation.Autowired;
import org.springframework.context.annotation.Bean;
import org.springframework.context.annotation.Configuration;
import org.springframework.security.crypto.bcrypt.BCryptPasswordEncoder;
import org.springframework.security.crypto.password.PasswordEncoder;
import org.springframework.web.servlet.config.annotation.InterceptorRegistry;
import org.springframework.web.servlet.config.annotation.WebMvcConfigurer;

import com.tenco.bank.handler.AuthInterceptor;

import lombok.RequiredArgsConstructor;

@Configuration // 하나 이상의 bean 등록
@RequiredArgsConstructor // 생성자 대신에 사용할 수 있음
public class WebMvcConfig implements WebMvcConfigurer {

	@Autowired
	private final AuthInterceptor authInterceptor;

	// 우리가 만들어 놓은 AuthInterceptor를 등록해야 한다.
	@Override
	public void addInterceptors(InterceptorRegistry registry) {
		registry.addInterceptor(authInterceptor)
			.addPathPatterns("/account/**")
			.addPathPatterns("file:\\work_spring\\upload/");
	}

	@Bean // IoC 대상 (싱글톤 처리)
	PasswordEncoder passwordEncoder() {
		return new BCryptPasswordEncoder();
	}

}
User.java
User.java
package com.tenco.bank.repository.model;

import java.sql.Timestamp;

import lombok.AllArgsConstructor;
import lombok.Builder;
import lombok.Data;
import lombok.NoArgsConstructor;
import lombok.ToString;

@Data
@NoArgsConstructor
@AllArgsConstructor
@Builder
@ToString
public class User {

	private Integer id;
	private String username;
	private String password;
	private String fullname;
	private String orginFileName; // 파일 업로드 관련
	private String uploadFileName; // 파일 업로드 관련
	private Timestamp createdAt;
}
SignUpDTO.java
SignUpDTO.java
package com.tenco.bank.dto;

import org.springframework.web.multipart.MultipartFile;

import com.tenco.bank.repository.model.User;

import lombok.AllArgsConstructor;
import lombok.Builder;
import lombok.Data;
import lombok.NoArgsConstructor;
import lombok.ToString;

@Data
@NoArgsConstructor
@AllArgsConstructor
@Builder
@ToString
public class SignUpDTO {
	// 화면에서 사용자의 id pw  등 받는 객체를 만든다.
    // 회원가입 할려면 -- 이름, 비밀번호, 풀네임 = 3개 필요

	private String username;
	private String password;
	private String fullname;
	private MultipartFile mFile;  // 해당하는 파일에 대한 데이터를 받아낼 수 있다.
    // // 리스트가 아닌 배열로 받는 이유 : 리스트가 가끔씩 잘 안먹혀서
	private String originFileName;
	private String uploadFileName;

	// 2단계 로직 - User Object 반환
	public User toUser() {
		return User.builder()
				.username(this.username)
				.password(this.password)
				.fullname(this.fullname)
				.orginFileName(this.originFileName)
				.uploadFileName(this.uploadFileName)
				.build();
	}

	// TODO - 추후 사진 업로드 기능 추가 예정
}
user.xml
user.xml
<insert id="insert">
		insert into user_tb( username, password, fullname, origin_file_name, upload_file_name)
		values( #{username}, #{password}, #{fullname}, #{originFileName}, #{uploadFileName})
	</insert>

<select id="findByUsername" resultType="com.tenco.bank.repository.model.User" >
		select * from user_tb where username = #{username}
	</select>
SQL user_tb 테이블 수정
user_tb
-- 스키마 수정
alter
table user_tb
add column origin_file_name varchar(200);

alter
table user_tb
add column upload_file_name varchar(200);

UserService 코드 수정 및 파일 추가
UserService.java
package com.tenco.bank.service;

import java.io.File;
import java.io.IOException;
import java.util.UUID;

import org.apache.catalina.authenticator.SavedRequest;
import org.springframework.beans.factory.annotation.Autowired;
import org.springframework.dao.DataAccessException;
import org.springframework.http.HttpStatus;
import org.springframework.security.crypto.password.PasswordEncoder;
import org.springframework.stereotype.Service;
import org.springframework.transaction.annotation.Transactional;
import org.springframework.web.multipart.MultipartFile;

import com.tenco.bank.dto.SignInDTO;
import com.tenco.bank.dto.SignUpDTO;
import com.tenco.bank.handler.exception.DataDeliveryException;
import com.tenco.bank.handler.exception.RedirectException;
import com.tenco.bank.repository.interfaces.UserRepository;
import com.tenco.bank.repository.model.User;
import com.tenco.bank.utils.Define;

import lombok.RequiredArgsConstructor;

@Service // IoC 대상( 싱글톤으로 관리)
@RequiredArgsConstructor
public class UserService {

	@Autowired
	private final UserRepository userRepository;
	@Autowired // 생성자 대신에 사용할 수 있음
	private final PasswordEncoder passwordEncoder;

//  @Autowired // 어노테이션으로 대체 가능 하다.
//  생성자 의존 주입 - DI
//  	@Autowired
//	public UserService(UserRepository userRepository) {
//		this.userRepository = userRepository;
//	}

	/**
	 * 회원 등록 서비스 기능
	 * 트랜잭션 처리
	 * @param dto
	 */
	@Transactional // 트랜잭션 처리는 반드시 습관화
	public void createUser(SignUpDTO dto) {

		int result = 0;

		System.out.println("----------------------------------");
		System.out.println(dto.getMFile().getOriginalFilename());
		System.out.println("----------------------------------");

		if(!dto.getMFile().isEmpty()) {
			// 파일 업로드 로직 구현
			String[] fileNames = uploadFile(dto.getMFile());

			dto.setOriginFileName(fileNames[0]);
			dto.setUploadFileName(fileNames[1]);
		}

		try {

			// 코드 추가 부분
			// 회원 가입 요청시 사용자가 던진 비밀번호 값을 암호화 처리 해야 함
			String hashPwd = passwordEncoder.encode(dto.getPassword()); // dto에서 패스워드를 가지고온다.
			System.out.println("hashPwd : " + hashPwd);
			dto.setPassword(hashPwd); // set으로 값을 변경 후 값 덮어쓰기

			System.out.println("11111111111");
			result = userRepository.insert(dto.toUser());

		} catch (DataAccessException e) {
			throw new DataDeliveryException("중복된 이름을 사용할 수 없습니다. ", HttpStatus.INTERNAL_SERVER_ERROR);
		} catch (Exception e) {
			e.printStackTrace();
			throw new RedirectException("알 수 없는 오류", HttpStatus.SERVICE_UNAVAILABLE);
		}
		if(result != 1) {
			throw new DataDeliveryException("회원가입 실패", HttpStatus.INTERNAL_SERVER_ERROR);
		}
	}

	public User readUser(SignInDTO dto) {
		// 유효성 검사는 Controller 에서 먼저 하자.
		User userEntity = null; // 지역 변수 선언

		// 기능 수정
		// username 으로만 가지고 --> select
		// 2가지의 경우의 수 --> 객체가 존재하거나 null이 떨어지거나

		// 객체안에 사용자의 password 가 존재 한다. (암호화가 되어있다.)

		// passwordEncoder 안에 matches() 메서드를 사용해서 판별한다. ex) "1234".equals(@!#@!RFDFS@#!#@FGG);

		try {
			userEntity = userRepository.findByUsername(dto.getUsername());
		} catch (DataAccessException e) {
			throw new DataDeliveryException("잘못된 처리 입니다.", HttpStatus.INTERNAL_SERVER_ERROR);
		} catch (Exception e) {
			// TODO: handle exception
			throw new RedirectException("알수없는 오류", HttpStatus.SERVICE_UNAVAILABLE);
		}

		// 아이디와 패스워드중에 하나 틀렸을 때
		if(userEntity == null) {
			throw new DataDeliveryException("존재하지 않는 아이디 입니다.", HttpStatus.BAD_REQUEST);
		}

		boolean isPwdMatched = passwordEncoder.matches(dto.getPassword(), userEntity.getPassword());
		if(isPwdMatched == false) {
			throw new DataDeliveryException("비밀번호가 틀렸습니다.", HttpStatus.BAD_REQUEST);
		}


		return userEntity;
	}

	/**
	 * 서버 운영체제에 파일 업로드 기능
	 *
	 * @param mFile
	 */
	private String[] uploadFile(MultipartFile mFile) {
		// 파일 업로드 구현

		// 방어적 코드
		if(mFile.getSize() > Define.MAX_FILE_SIZE) {
			throw new DataDeliveryException("파일 크기는 20MB 이상 클 수 없습니다.", HttpStatus.BAD_REQUEST);
		}

		// 서버 컴퓨터에 파일을 넣을 디렉토리가 있는지 검사
		String saveDirectory = Define.UPLOAD_FILE_DERECTORY; // C:\\work_spring\\upload/
		File directory = new File(saveDirectory);
		if(!directory.exists()) {
			// 존재하면 true 반환 존재하지 않으면 false 반환
			directory.mkdirs();
		}

		// 파일 이름 생성(중복 이름 예방)
		String uploadFileName = UUID.randomUUID() + "_" + mFile.getOriginalFilename();
		// 파일 전체경로 + 새로 생성한 파일명
	//	String uploadPath = saveDirectory + uploadFileName;
		String uploadPath = saveDirectory + File.separator + uploadFileName; // 리눅스나 이런데서 사용
		File destination = new File(uploadPath);

		// 반드시 수행
		try {
			mFile.transferTo(destination); // transferTo 옮기는 작업
		} catch (IllegalStateException | IOException e) {
			e.printStackTrace();
			throw new DataDeliveryException("파일 업로드 중에 오류가 발생했습니다.", HttpStatus.INTERNAL_SERVER_ERROR);
		}

		return new String[] {mFile.getOriginalFilename(), uploadFileName}; // 리턴과 동시에 초기화 작업
	}

}


'Spring boot' 카테고리의 다른 글
| Bank App 만들기 - 존재하지 않는 경로에 대한 요청 처리(404) (0) | 2024.09.28 |
|---|---|
| Bank App 만들기 - 파일 업로드(ResourceHandler 사용) (0) | 2024.09.28 |
| Bank App 만들기 - 사용자 비밀번호 암호화 처리 (0) | 2024.09.28 |
| Bank App 만들기 - intercepter 활용(인증검사 공통 처리) (0) | 2024.09.28 |
| Bank App 만들기 - 계좌 상세보기 페이징처리 (0) | 2024.09.27 |


