
햄발
Spring Boot Blog 프로젝트 만들기(JPA) - 간단한 요청,응답 동작 방식 본문
학습 목표

1. 디스패처 서블릿에 대해서 알아 보자.
2. 메시지 컨버터와 뷰 리졸버를 기억해 보자.
스프링 부트 그림으로 요약한 요청과 응답에 흐름 살펴 보기

- 클라이언트 측에서 /user로 GET 요청을 합니다.
이 요청은 톰캣을 거쳐 스프링 부트 애플리케이션으로 전달됩니다. - 이때, 스프링 부트의 디스패처 서블릿(DispatcherServlet)이 요청을 받습니다.
디스패처 서블릿은 요청된 URL을 분석하고, 이를 처리할 수 있는 컨트롤러와 해당 메서드를 찾습니다. - 컨트롤러에서 비즈니스 로직이 필요한 경우, 비즈니스 계층(Service) 및 퍼시스턴스 계층(Repository)을 통해 데이터를 처리합니다.
- 응답 과정에서 MIME 타입(예: JSON, HTML, XML 등)에 따라 다음과 같이 응답 방식이 달라집니다:
- JSON, XML 등 데이터 포맷으로 응답해야 하는 경우, 메시지 컨버터가 작동합니다.
예를 들어, @ResponseBody가 붙은 메서드는 메시지 컨버터를 사용하여 자바 객체를 JSON 또는 XML로 변환합니다. - HTML 등의 뷰 템플릿이 필요한 경우, 뷰 리졸버(View Resolver)가 작동하여, 템플릿 엔진(예: Thymeleaf, JSP)을 통해 HTML 문서를 생성하여 클라이언트에게 반환합니다.
- JSON, XML 등 데이터 포맷으로 응답해야 하는 경우, 메시지 컨버터가 작동합니다.
ctrl + shift + p
>spring init 입력
spring boot gradle 클릭
3.2.10 클릭
java 클릭
com.tenco 입력
프로젝트 명 : demo_v1
jdk 버전 : 21
dependency 선택 : spring web 선택, spring devTools 선택, lombok 선택, h2 database 선택
파일 --> 기본설정 --> 바로가기 키
GetApiController.java
package com.tenco.demo_v1.controller;
import java.util.Map;
import org.springframework.web.bind.annotation.GetMapping;
import org.springframework.web.bind.annotation.RequestParam;
import org.springframework.web.bind.annotation.RestController;
import lombok.AllArgsConstructor;
import lombok.Getter;
import lombok.ToString;
@RestController // IOC 대상이 된다. --> @Controller + @ResponseBody
// @RequestMapping("/xxxx") -> 대문 달기
public class GetApiController {
// 주소설계 : http://localhost:8080/hello
@GetMapping("/hello")
public String hello() {
// 메시지 컨버터가 동작 한다.
// StringHttpMessageConverter 객체가 동작한다.
return "Say Hello ~";
}
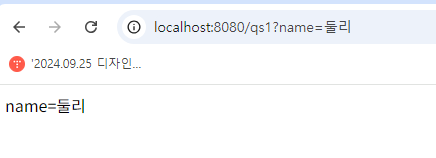
// 쿼리스트링 방식(@RequestParam)
// 주소설계 http://localhost:8080/qs1?name=둘리
@GetMapping("/qs1")
public String gs1(@RequestParam(name = "name") String name) {
return "name=" + name;
}
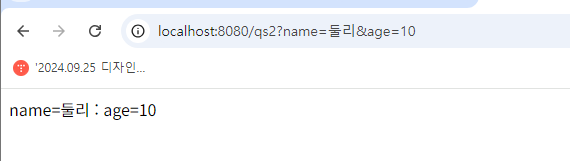
// 주소설계 http://localhost:8080/qs2?name=둘리&age=10
@GetMapping("/qs2")
public String gs2(@RequestParam(name = "name") String name,
@RequestParam(name = "age", required = false, defaultValue = "1") Integer age ) {
return "name=" + name + " : age=" + age;
}
// 주소설계 http://localhost:8080/qs3?name=둘리&age=10&groupId=com.tenco
@GetMapping("/qs3")
public String gs3(@RequestParam Map<String, String> data) {
// Map 방식으로 동적으로 데이터 바인딩 하기
StringBuffer sb = new StringBuffer();
data.entrySet().forEach( entry -> {
System.out.println(entry.getKey());
System.out.println(entry.getValue());
System.out.println();
sb.append(entry.getKey() + "=" + entry.getValue());
});
return sb.toString();
}
/**
*
*/
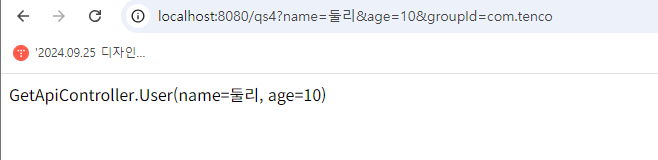
// 쿼리스트링 방식(@RequestParam)
// 주소설계 http://localhost:8080/qs4?name=둘리&age=10&groupId=com.tenco
@GetMapping("/qs4")
public String gs4(User user) {
return user.toString();
}
// 클래스
@AllArgsConstructor
@Getter
@ToString
class User {
private String name;
private Integer age;
}
}
DemoV1Application.java
package com.tenco.demo_v1;

import org.springframework.boot.SpringApplication;
import org.springframework.boot.autoconfigure.SpringBootApplication;

@SpringBootApplication
public class DemoV1Application {

	public static void main(String[] args) {
		SpringApplication.run(DemoV1Application.class, args);
	}

}

'Spring boot' 카테고리의 다른 글
| Spring Boot Blog 프로젝트 만들기(JPA) - POST 방식에 이해 및 실습 (0) | 2024.09.28 |
|---|---|
| Spring Boot Blog 프로젝트 만들기(JPA) - GET 방식과 URL 주소 설계 (0) | 2024.09.28 |
| Spring Boot Blog 프로젝트 만들기(JPA) (0) | 2024.09.28 |
| Bank App 만들기 - OAuth 2.0(Open Authorization) (0) | 2024.09.28 |
| Auth 2.0 카카오 (0) | 2024.09.28 |
'Spring boot' Related Articles
more


